CREATE TABLE Command in SQL
For Complete YouTube Video: Click Here
In this class, we will understand CREATE TABLE Command in SQL.
We have already discussed how to download and install oracle 18c.
Table of Contents
CREATE TABLE Command in SQL
In this class, we will learn our first command to create a table in SQL.
The image below is the database schema.
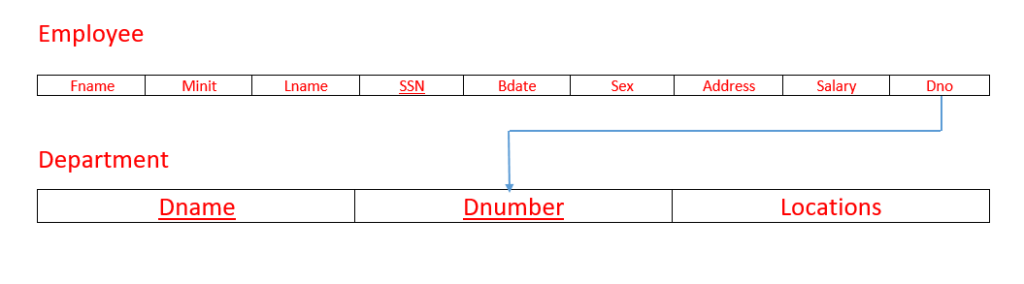
In this class, we will discuss only the creation table the relationship between the tables will be discussed in our later classes.
The general syntax to create a table in SQL is as shown below.
CREATE TABLE tablename (columnname datatype(size) otherattributes, columnname datatype(size) otherattributes, columnname datatype(size) otherattributes, columnname datatype(size) otherattributes);
Every command in SQL will have its syntax and keywords.
CREATE TABLE is the keyword that follows the name of the table.
After the name of the table, we have to give open parentheses.
After the parentheses, we have to start with the column name following the data type with the size of the data type.
The size of the data type means the number of characters or digits that the value in the column can have.
The column name and the data type of the column are mandatory.
The column names should not have spaces.
After the data type, we have to provide the other attributes.
We will discuss the other attributes whenever the contest comes.
Similarly, all the attributes are created.
Creating Employee table
Below is the command to create the table.
CREATE TABLE employee ( Fname varchar(15) NOT NULL, Minit varchar(1), Lname varchar(15) NOT NULL, SSN varchar(9) NOT NULL, Bdate date, Address varchar(30), Sex varchar(1), Salary float, Dno int NOT NULL, PRIMARY KEY (ssn));
The name of the table is the employee.
In the parentheses, the first column name is Fname which is of type varchar and size 15.
Varchar data type means the values in the Fname are characters.
Size 15 means the maximum number of characters is 15.
In the other attributes place, we have provided NOT NULL.
NOT NULL means null values are not allowed in this column.
If we specify a column as NOT NULL, an employee without the fname is not allowed to get inserted into the table.
The employees must have first names.
The specifications for the second column are Minit varchar(1).
Minit stands for Middle Initial.
The second column name is Minit, and it is of type varchar of size 1 character.
NOT NULL is not provided means the employees without the middle initial are allowed.
Similarly, the specifications of the third column are Lname varchar(15) NOT NULL.
The specifications of the fourth column are SSN varchar(9) NOT NULL so on.
After specifying all the table columns, we have ‘specified’ the ‘key’ attribute of the table.
We can specify the ‘key’ attribute of a table in two different ways.
One way to specify at the end of defining all the columns is as we have done above.
PRIMARY KEY (ssn).
In the relational model, we call ‘key’ attributes a primary key.
Creating Department table
We suggest you write the command for the creating of the department table before going further.
Below is the command for the department table.
CREATE TABLE department (Dname varchar(15) NOT NULL, Dnumber int NOT NULL PRIMARY KEY, Locations varchar(20) NOT NULL);
In the above command, we define PRIMARY KEY in the column declaration itself, as shown below.
Dnumber int NOT NULL PRIMARY KEY.
Dnumber is the primary key for the department table.
Implementation of the employee and department table
First, we will create the employee table.
Open the sqlplus and type the command as we have discussed above.
The image below shows the output generated after creation.

Similarly, for the department table.

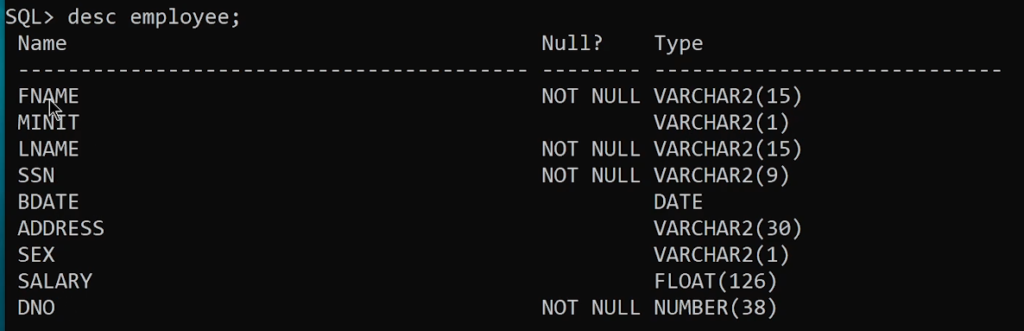
To check the table was created, use the desc command.
Desc stands for the description of the table.
The command is desc employee.
The image below is the description of the table.
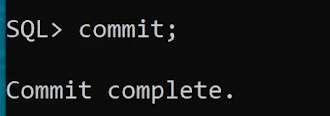
One more ‘important’ command is ‘commit.’
After executing every command, use the commit command.
Commit command will save the work that we have done so far.
Without using the commit command, we can not save the work.
The image below shows the output after executing the commit command.